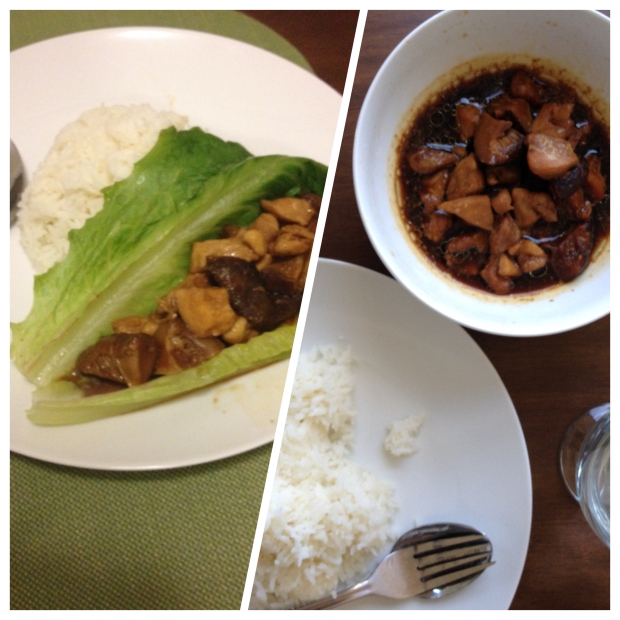
Comforting Chicken and Shittake Mushroom Stew

I’ve often fantasized about making this Comforting Chicken and Shittake Mushroom Stew whenever I craved for a simple meal with lots of gravy . Finally I cooked this dish in an attempt to make the a nice meal for W last week when he was ill with a bad cold.

The stew turned out to be right up our taste alley. It was even better the next day for lunch – loved the mushrooms. A little on the oily side (I wasn’t as thorough in trimming the chicken fat as I could have been), but very satisfying with Thai white rice.

stew1ste2

I’ve approximated the measurements here but I’m afraid my recipe is not tried and tested at all. Still, wanted to share.

Comforting Chicken and Shittake Mushroom Stew // Served two ways here

Ingredients:
400 grams chicken thighs, in bite-sized pieces
6-8 x dried Shittake mushrooms, soaked in warm water so that they are reconstituted and soft (remove stalks)
2x cloves garlic, minced finely
a small section of ginger (I use about 4 cm squared), finely sliced into little matchsticks
vegetable oil, 1 tablespoon
salt

for the sauce:
light soy sauce, 1.5 tablespoons
dark soy sauce, 1.5 tablespoons
oyster sauce, 1 tablespoon
rice wine/Shaoxing wine/sherry, 0.5 tablespoon
water, one-third cup
ground white pepper, a few dashes

Method:
0. Soak Shittake mushrooms in warm water. This is done preferably a few hours before cooking but if in a rush, use boiling water and half an hour should do it. Slice each mushroom into 4 wedge pieces.
1. Chop chicken thighs into bite-sized pieces, removing excess skin and fat. Marinate with salt.
2. Heat wok on low-medium heat. Add oil.
3. When oil is hot, stir-fry garlic and ginger until fragrant.
4. Add chicken to wok, stir-fry.
5. When chicken is slightly browned on outside (not completely cooked inside though), add mushrooms.
6. Mix mushrooms and chicken.
7. Mix ingredients for the sauce in bowl. Add to wok.
8. Cover wok with lid. Once mixture has come to a boil, turn heat down to low so that it is just simmering.
9. Let simmer on low heat for at least half an hour.
10. Make sure that there is enough liquid to just barely cover the protein. Add water 1 tablespoon at a time if necessary.
11. Taste stew and add salt to taste.
12. You’re done!

When making this last week, I added a few large Romaine lettuce leaves to the wok to steam them for 2 minutes before switching off the heat. I then ladled the stew on top of the lettuce. It was an easy way of getting some green in our meal without having to prepare a side.

In my college days, I used to make a version of this with small chunks of potato – also yummy but the starch in the potato would make the sauce very thick. I refer this version for its relative simplicity.

Enjoy!
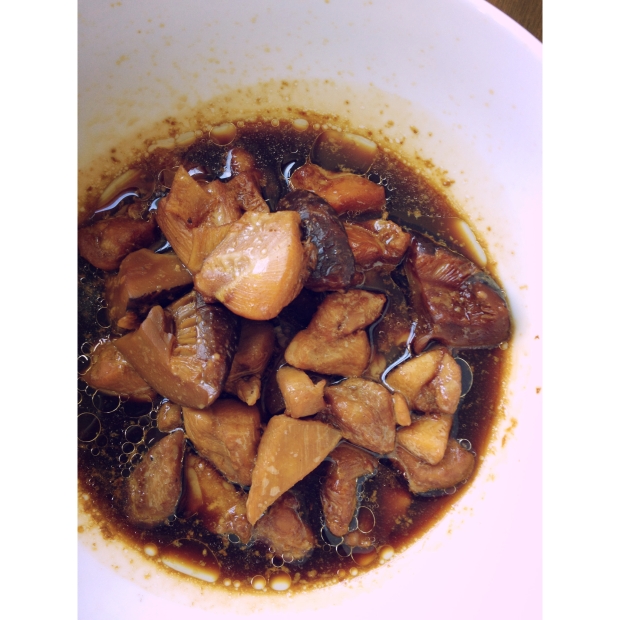
Simple Chinese Braised Pork(紅燒肉)

Sorry for the slight hiatus in posts — I was in Paris last weekend for a quick getaway , and somehow got caught up with various things ever since! But as the Clouds of Oxford have decided to pour down every last bit of rain they’ve got on us today, I thought I would get to my backlog of blogging while I curl up at home … and first up in the queue, Chinese Braised Pork!

Soft pork shoulder spiced with Chinese spices and served with mushroom and egg

This was my first attempt at making Chinese Braised Pork, more commonly known as ‘Hong Shao Rou’ 紅燒肉. There are many versions of this dish typically made with pork belly. I realise that pork belly is not something that one normally stocks in the freezer, so I’ve used pork shoulder because I had some bought some the week before on offer and also because pork shoulder has enough fat to mimic the fatty layer one finds in pork belly. It was a bit of a gamble to be honest — I’ve never seen this dish made with any other cut of pork, but hey, fortune favours the brave, no?

Thankfully it turned out well; pork shoulder doesn’t have that thick layer of fat that pork belly does, so I adjusted by slicing the meat into smaller cubes, and adding water throughout to ensure that the pork was kept moist. You can see from the photo that a lot of the fat is still rendered into oil, but I guess that’s what makes this dish so yummy and great to eat with steamed white rice! And what I particularly like about this dish is that it is like Chinese cuisine’s answer to the standard and might I say slightly boring, beef stew. The cloves and star aniseed lend a different flavour to the meat; I don’t know quite how to describe it, but the flavour of the dark sauce becomes very warm, almost like a peppery cinnamon flavour. (But better than cinnamon… I’m not so much a fan of cinnamon.)

Chinese Braised Pork (紅燒肉)

Ingredients (serves four persons)
– 400-500 grams pork shoulder or pork belly. Slice so that layer of fat is evenly distributed across the cubes of meat — slice against the grain (perpendicular to the direction of the fibres of meat).
– 6-8 dried Chinese mushrooms, soaked in cold water and then drained after they have become puffy/reconstituted
– 4 eggs, hard-boiled in advance and de-shelled
– 2 garlic cloves, skin peeled
– water, 500 ml to start with, add more throughout braising process
– 2 Tbsp dark soy sauce
– 1/2 tsp Chinese 5-spice powder
– 1 star anise
– 4 cloves
– 2 Tbsp rock sugar
– 1 tsp salt
– 1 Tbsp mirin, or Shaoxing cooking wine
– 2 Tb vegetable oil
– salt and white pepper to taste
– 1 stalk spring onion, as a garnish

Method
0. Prepare the pork by first blanching with boiling water. Drain away the water. This will lend itself to a cleaner stew of pork, without some of the scum that you sometimes get when simmering it.
1. Heat oil in wok, or deep bottomed non-stick pan on medium-high heat. When oil is hot, brown the cubes of fatty pork shoulder, adding the dark soy sauce to the wok.
2. When both sides of pork are brown, add in water, garlic cloves, mushrooms, Chinese 5-spice, star aniseed, cloves, soy sauce, mirin (or some kind of white cooking wine), rock sugar, salt. Cover wok/pan with lid. Turn down heat to medium or low so that the meat can simmer away slowly.
3. Simmer for at least an hour and a half. The longer you simmer the meat, the softer and more tender it will become!
4. Add in hardboiled eggs in the last 10 minutes or so. Taste the sauce and add a dash of white pepper, and salt if necessary.
5. Garnish with spring onion (optional). Serve with steamed white rice.

The smell of the spices reminds me so much of home… it is certainly a nostalgic dish, one to be made on rainy days, which are not rare in England. Now that the days are getting shorter, I’m going to have to slowly arm myself with comfort foods like this.